A home-made, digital wedding guestbook
Origin
In early 2023, my wife (back then fiancée) and I started planning our wedding reception to be held in June. In addition to hosting a wedding banquet, we also wanted to add a bit of interactive element and fun into it. After all, it’s a once in a lifetime experience. :)
We were looking for inspirations online, and came across the idea of handing out marriage advice cards to the guests. The idea of receiving heart-warming messages and advice from our friends and family sounded awesome, so we decided to design and print the cards ourselves. Essentially, we were making a guestbook.
The problem? We also like to keep the photos taken on the actual day to be shared with everyone. Of course, services like Facebook or Instagram could have been used for this purpose. But since we were designing the marriage advice cards already, we might as well push it a little further, making it our own online guestbook instead.
yjsh.day
We took our initials and bought a domain name yjsh.day (which is no longer active), then got right down to work.
Design
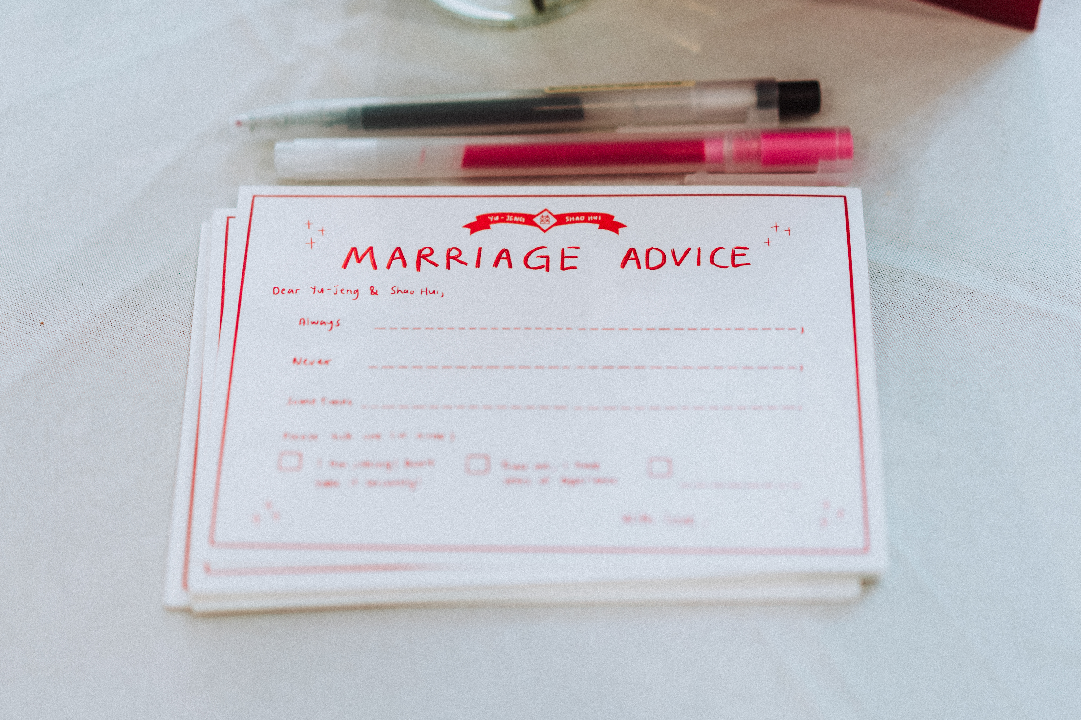
Physical Cards
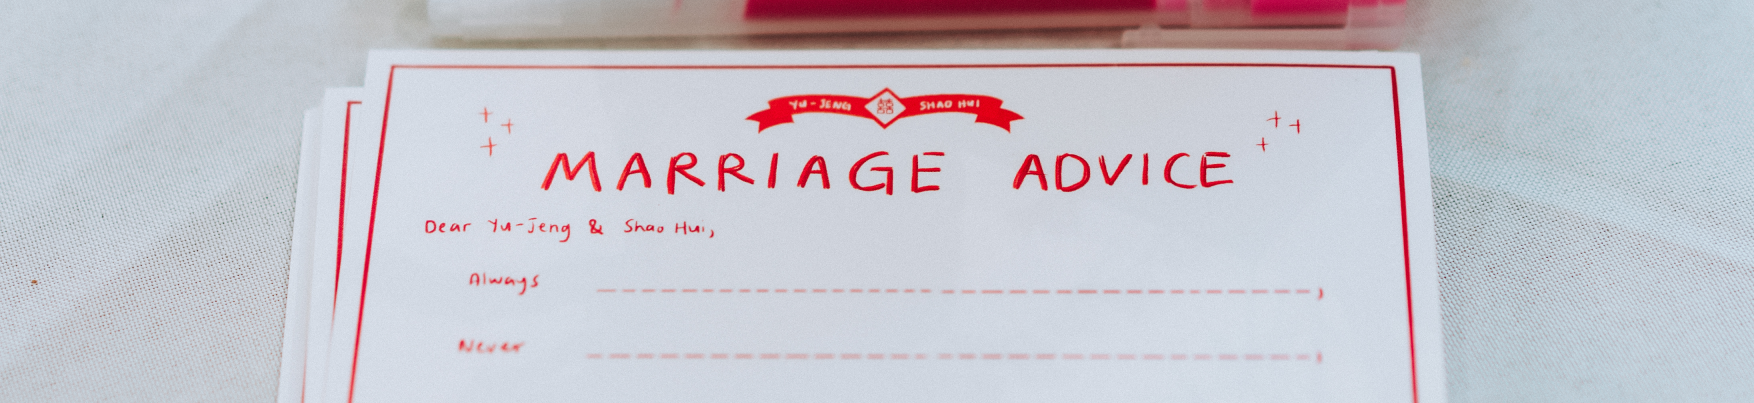
SH sketched out 5 different designs for the physical cards to be printed and handed out on the actual day. They are:
- Advice — General marriage advice
- Share — Share a memory with us
- Suggest — Suggest an date night idea
- Tell — Tell us something we don’t know
- Predict — Predict our future
For example, the physical version of the first card (Advice) looks like this:
Web application
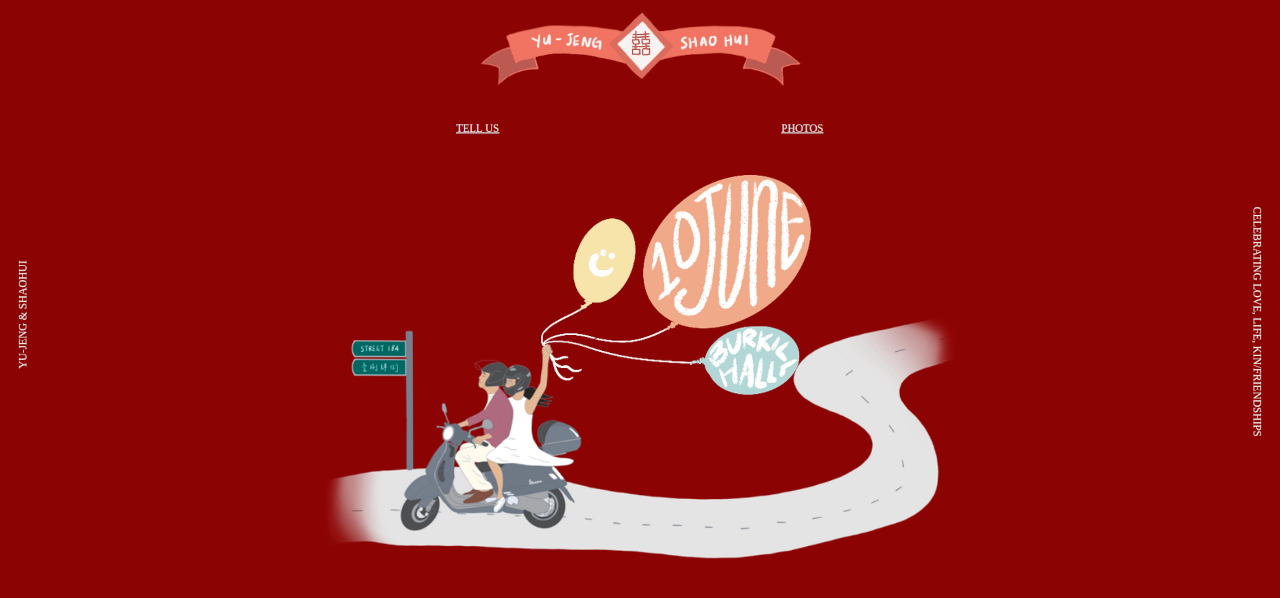
For the design of the web application, SH started out with a sketch in Figma.
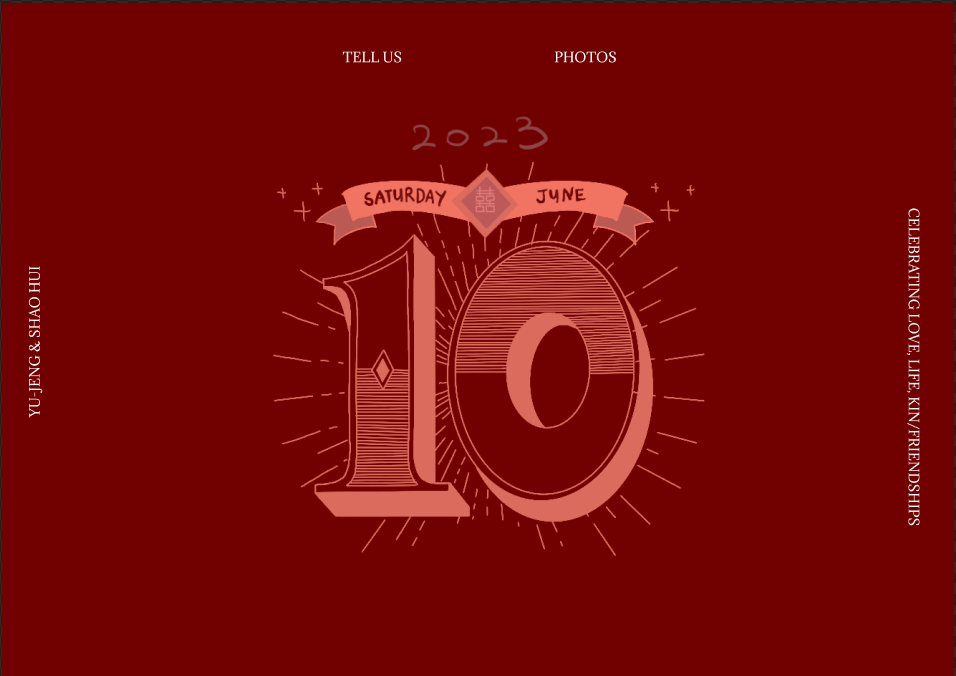
In addition to the landing page (leftmost image), the web app consists of two main features:
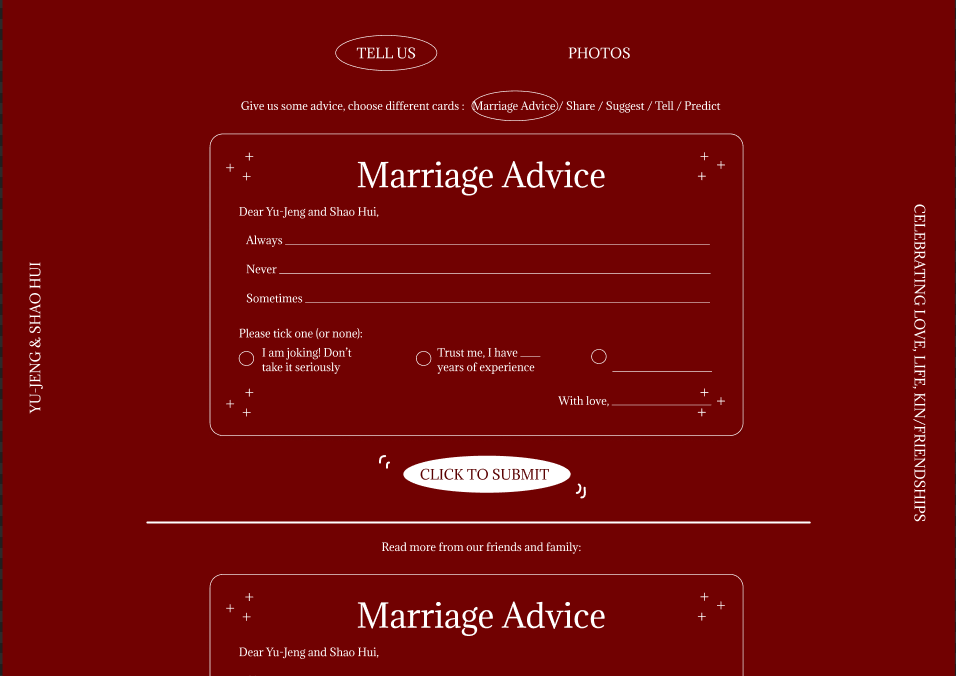
- Tell Us — digital guestbook
- Photos — photo gallery
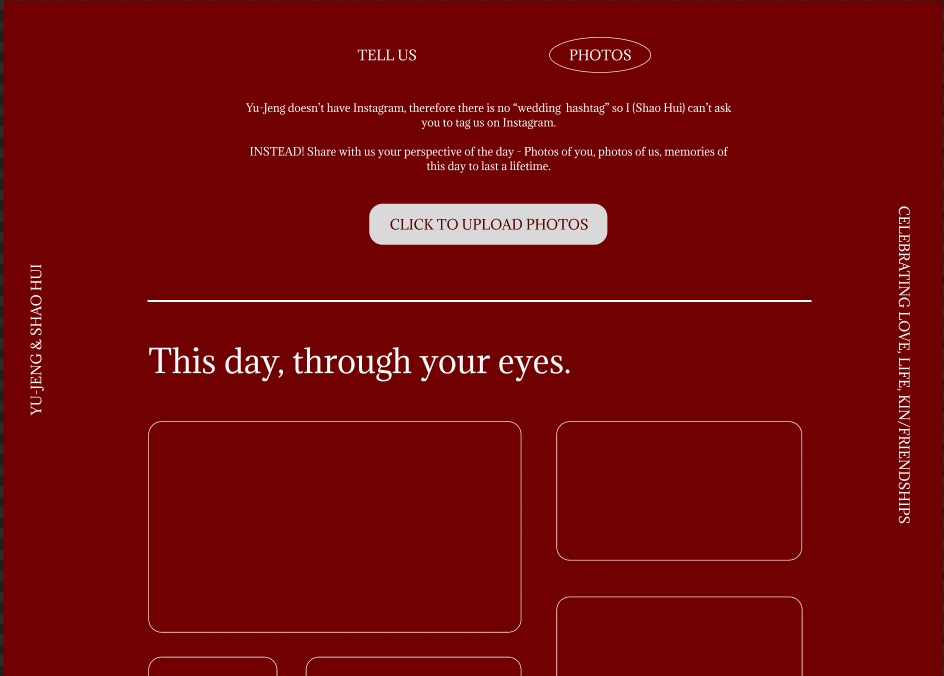
Tell Us
Instead of writing the physical cards, the idea here is that our guest can fill out any advice card on their mobile device, and submit it directly to us. The messages submitted will be displayed on the web app right away, sharing it with everyone else.
Photos
If there is any photo that our guests would like to share, this page provides a mean for them to upload it directly to us. The photos in the gallery will be updated as the submissions coming in.
Implementation
As the design was being settled and finalized, I started looking into how to structure the app, and what tools to use.
Tools and frameworks
I had some professional experience developing desktop application using JavaFX framework, but building a web application was my first time. I quickly went through the fundamentals of Web Development, and picked up React.js and Next.js in 2 months. In hindsight, going with React and Next.js was a correct and safe decision. These are very popular choices in modern web development, which makes it easy to find resources and helps online.
Architecture
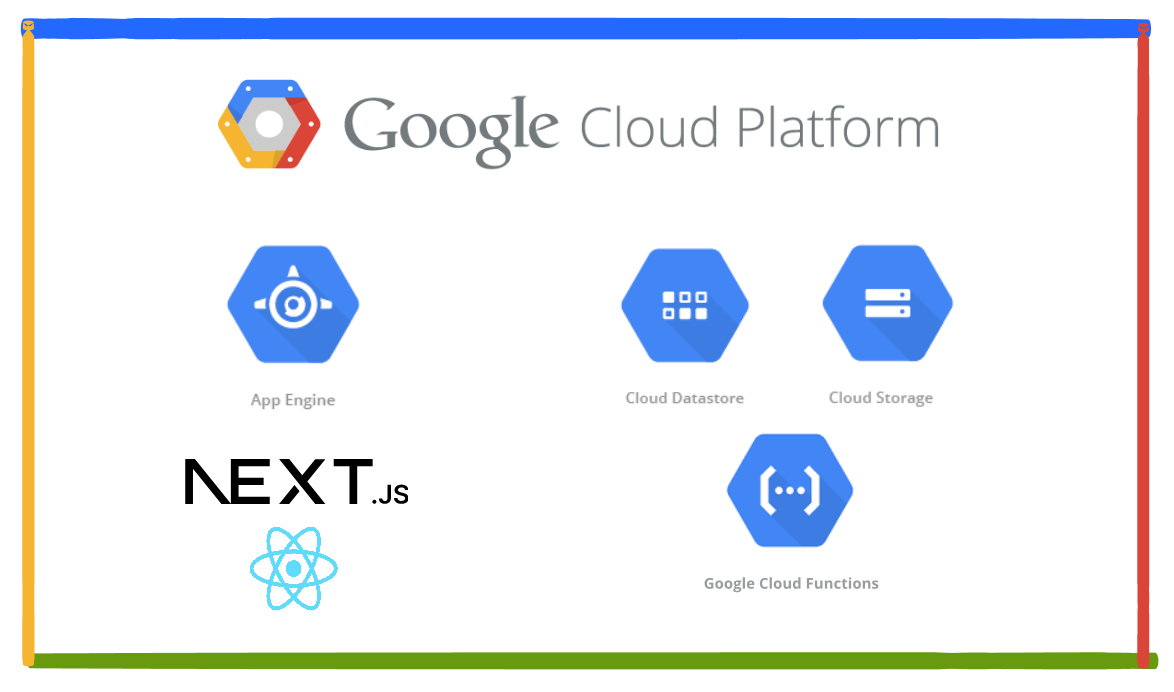
As Google Cloud Platform (GCP) was offering new customers a 90-day free trial (with $400 USD worth of credits), I decided to build the application around these GCP services:
- Datastore — NoSQL database for storing messages
- Cloud Storage — Object storage for photos
- Cloud Function — Serverless execution environment for thumbnail generation
- Google App Engine — Fully managed environment for app deployment
For example, the text messages received from the guest were stored in Google Datastore, a NoSQL database. The photos shared by our guest were uploaded to Cloud Storage. For every photo uploaded, a Cloud Function was triggered to scale down the image to a thumbnail. The Google Cloud Client Libraries were used to build the API Routes in Next.js. And finally, the application itself was deployed in the Google App Engine (GAE).
The reason I deployed the app in Google App Engine instead of on Vercel is because that I was also preparing for Google Cloud Associate Engineer Certification and simply wanted to get some hands-on experience1.
Dependencies
In addition to the GCP client libraries, two additional libraries were installed: SWR and Photoswipe for React.
- SWR — A React Hooks library to perform Client-side data fetching without jeopardizing the performance
- Photoswipe – A React component wrapper that offers ready-made interface for the user to browse the pictures in a gallery.
Results
It took me around a month to build, test, debug and finally deploy the web app. Just like every other product in real life, the final implementation is never the same as the initial design. But it’s close enough! This is how the landing page looked when it’s implemented.
On the actual day, we received a handful of messages and numerous photos through the app. Seeing the application working, bringing in all the messages from our guest was fantastic. To me, it was a successful experiment!
I disabled the features for uploading photos and messages sometime after the wedding. But you can still visit the app. The source code can be found in my Github.
Final thoughts
I couldn’t be more happy about how the idea came about, and that it finally got implemented and was running as desired. I have learned a lot about web development during the process, and certainly gained more experience working with the cloud.
Many thanks to my wife SH for working with me on this project, it would not have been possible without her.
-
I passed the Associate Cloud Engineer certification exam 2 months after the project. ↩